Question 1.
What is a flight controller and why is it important for FPV drones?
What is a Flight Controller and Why is it Important for FPV Drones?
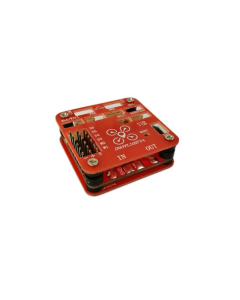
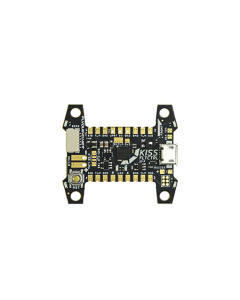
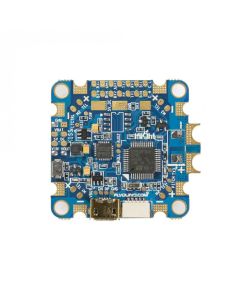
A flight controller serves as the pivotal "brain" of an FPV drone, orchestrating every movement with precision. At its core, this vital component is a sophisticated circuit board embedded with a range of sensors tasked with monitoring the drone’s orientation and interpreting the pilot’s commands.
Functionality of a Flight Controller
-
Movement Detection: The flight controller is equipped with essential sensors such as gyroscopes and accelerometers. These sensors help determine the drone’s angle, tilt, and overall motion in real time.
-
Command Processing: By processing input from the drone’s remote control, the flight controller decides how each motor should respond to achieve the desired motion or maneuver.
-
Motor Adjustment: With accurate data on orientation and control commands, the flight controller adjusts the motor speeds independently, enabling the drone to navigate through intricate paths and dynamic environments with agility.
Enhancing Drone Capabilities
Many advanced flight controllers come with additional sensors to boost accuracy and facilitate autonomous operations:
-
Barometric Pressure Sensors: Also known as barometers, these determine altitude variations, critical for maintaining stable flight at various heights.
-
Magnetometers: Functioning as compasses, these sensors aid in navigation and orientation, especially during autonomous flight missions.
Flight controllers also act as central hubs connecting to various external components like Electronic Speed Controllers (ESCs), GPS modules, LED lights, servos, radio receivers, FPV cameras, and video transmitters (VTX). This integration is crucial for expanding the functional capabilities of the drone.
Why is a Flight Controller Crucial?
The flight controller is indispensable for ensuring an FPV drone can respond adeptly to pilot inputs while maintaining balance and stability. By constantly processing data and adjusting motor outputs, it allows for seamless navigation and thrilling maneuverability, which FPV enthusiasts cherish. Without it, achieving precision control and the exhilarating experience of FPV flying would be impossible.
Question 2.
What are the options for flight controllers that support GPS and return-to-home features?
When choosing a flight controller that supports GPS and return-to-home features, you have several notable options:
Popular Flight Controllers
-
Pixhawk: This versatile platform is renowned for its robust GPS capabilities and reliable return-to-home functionality. It's a favorite among hobbyists and professionals alike for its adaptability to various types of drones.
-
BetaFlight: Known for its user-friendly interface and ease of configuration, this controller is perfect for those who prioritize a customizable flying experience with solid GPS support.
-
Ardupilot: As an open-source option, Ardupilot offers extensive community support and frequent updates. It's trusted for its precise navigation and dependable return-to-home operations.
Key Features to Consider
When evaluating flight controllers, keep an eye out for the following features:
-
Ease of Configuration: Some systems offer intuitive software for quick setup and adjustments.
-
Community and Support: Opt for a platform with active forums and resources.
-
Expandability: Choose controllers that allow integration with additional sensors for enhanced flight data.
These flight controllers combine advanced navigation features with ease of use, making them excellent choices for any drone enthusiast or professional pilot seeking reliable GPS and return-to-home capabilities.
Question 3.
What features should a flight controller have for optimal performance in FPV drones?
When selecting a flight controller for optimal FPV drone performance, there are several key features and components to consider. Each of these elements plays a significant role in enhancing the drone's capabilities and ensuring a smooth flying experience.
Key Features of a Flight Controller
1. Blackbox Logging
A highly valuable feature for drone enthusiasts is the ability to log flight data, which is crucial for tuning and troubleshooting. Options are typically integrated flash memory or an onboard SD card reader. Flash memory is cost-effective but limited in storage—often enough for just a few minutes of data. An SD card, however, offers extensive storage, allowing for continuous logging. This data is instrumental in diagnosing performance issues and optimizing the drone's settings.
2. Connector Types
Flight controllers offer various connector options:
-
Plastic JST Connectors: Convenient but less durable.
-
Solder Pads: More robust, these require some soldering skills but offer reliable connections.
-
Through Holes: These allow for either direct soldering or using header pins, providing more flexibility for different builds.
3. Battery Eliminator Circuit (BEC)
A battery eliminator circuit regulates power across your flight controller. Most controllers come with a 5V BEC to power the radio receiver and GPS. Others offer a 9V or 12V BEC, which is ideal for powering video transmitters. While FPV gear can operate directly from the LiPo battery, using a regulated power source like a BEC is preferable as it reduces noise and protects devices from voltage spikes.
4. Barometer
For drones utilizing GPS, a built-in barometer can significantly improve the accuracy of GPS-assisted modes like GPS Rescue. While not essential, it provides an extra layer of precision, particularly useful for advanced maneuvers or in challenging environments.
5. On-Screen Display (OSD) Chip
In analog FPV systems, an integrated OSD chip (such as AT7456E) is vital for displaying crucial flight data on the screen. However, for digital FPV systems like DJI, HDZero, and Walksnail, a separate OSD is not necessary; these systems require only a spare UART for OSD functionality.
Conclusion
When choosing a flight controller, consider these features to ensure that your FPV drone performs at its best. Incorporating the right combination of logging capabilities, connection options, and power regulation will greatly enhance your flying experience and allow for precise tuning and improvement of the drone's performance.
Question 4.
How do flight controllers work in stabilizing and maneuvering FPV drones?
How Do Flight Controllers Work in Stabilizing and Maneuvering FPV Drones?
Flight controllers, often abbreviated as FCs, play a crucial role in stabilizing and maneuvering FPV drones. Acting as the drone's cognitive hub, these intricate circuit boards are packed with sensors that capture data on the drone's orientation and movement. Let's explore how they function to enhance your flying experience.
Key Sensors and Their Functions
-
Gyroscope:
-
This sensor detects angular velocity, enabling the FC to understand the drone's rotation in three-dimensional space. It essentially tells the controller how fast and in which direction the drone is turning.
-
-
Accelerometer:
-
It measures changes in speed and direction, helping to maintain balance by detecting linear movement. This ensures smooth takeoffs, landings, and while hovering.
-
-
Barometric Pressure Sensors:
-
Also known as barometers, these sensors measure altitude by assessing the air pressure. They aid in maintaining a steady flight path, especially during autonomous or altitude hold modes.
-
-
Magnetometer:
-
Acting like a digital compass, this sensor aligns the drone with the Earth's magnetic field, improving navigation and orientation.
-
Integrating with Other Components
Flight controllers act as a central hub, integrating seamlessly with various peripherals:
-
Electronic Speed Controllers (ESCs): These adjust motor speed based on commands from the FC, enabling precise maneuvers.
-
Global Positioning System (GPS): Often used for navigation and advanced functions like return-to-home, enhancing the drone's autonomy.
-
Radio Receiver: It receives pilot inputs and relays them to the FC, allowing the drone to respond accurately to commands.
-
FPV Camera and Video Transmitter (VTX): Ensure real-time video feed is available, crucial for first-person view control.
The Process of Stabilization and Control
Upon receiving inputs from these sensors and components, the flight controller processes the data to determine necessary adjustments. It then swiftly modifies motor speed and direction, ensuring the drone remains stable and responsive to pilot controls. This real-time data processing and correction is why drones can hover steadily or maneuver with agility.
By interpreting sensor data and integrating it with peripheral inputs, flight controllers transform potential chaos into a symphony of controlled flight. They are the silent directors behind the effortless grace of FPV drones in the sky.
Question 5.
What is the potential issue with using a KK board on a drone when increasing the throttle?
Understanding KK Board Restarts on Drones
When operating a drone with a KK board, you might encounter a restart issue as you increase the throttle. This situation often leads to unexpected flights and frustrating troubleshooting. Let's delve into the potential cause and solution for this problem.
The Voltage Drop Dilemma
One primary reason for a KK board restarting when throttle is increased is due to a sudden drop in voltage. As you push the throttle, more power is demanded, which can cause the battery voltage to dip significantly. If this voltage drops to around 6.1 volts or lower, it may not be sufficient to keep the KK board functioning, triggering a restart.
The Importance of Voltage Thresholds
KK boards, like many flight controllers, require a stable voltage above a certain threshold to operate effectively. If the voltage supplied falls below this threshold, the board can lose power and restart. Check the specifications of your KK board to confirm the minimum voltage requirements. Typically, keeping the voltage well above 6.1 volts is necessary to prevent restarts.
Steps to Mitigate Voltage Issues
-
Battery Health Check: Ensure your battery is in good condition and fully charged. Old or overused batteries might not deliver sufficient power when needed.
-
Upgrade to a Higher Capacity Battery: Consider using a battery with a higher capacity to provide more consistent voltage, even under high load.
-
Inspect Power Connections: Loose or frayed wiring can exacerbate voltage drops. Make sure all connections in your power system are secure and in good condition.
-
Use a Capacitor: Installing a low ESR capacitor can help smooth out voltage spikes and dips, providing more stability when the throttle increases.
-
Voltage Monitoring: Implement a system to monitor voltage in real-time during flight. An alert can notify you if the voltage nears the critical threshold so you can take action before a restart occurs.
By addressing these potential issues, you can help ensure that your drone remains responsive and stable, even as you increase the throttle. Keeping a close eye on voltage levels is crucial to prevent unnecessary KK board restarts and ensure a smooth flying experience.
Question 6.
What is a simple flight controller recommendation for basic flying with FPV and HD camera capabilities?
Finding the Right Flight Controller for Your Needs
If you're diving into the world of drones and want a straightforward flight controller for basic flying, you're in the right place. Let's explore what you need.
Key Features to Consider:
-
Ease of Connection: Look for a flight controller that easily integrates with a computer for seamless settings adjustments. USB compatibility is common and user-friendly.
-
FPV and Camera Support: Ensure the flight controller can handle FPV (First Person View) integration and supports an HD camera. This feature is essential for capturing high-quality visuals during your flights.
-
Stability and Compatibility: A flight controller compatible with a 450mm frame is perfect for hobbyists who want stability. It should offer reliable performance without overwhelming complexity.
-
Expandability: If you're thinking about attaching a gimbal in the future, opt for a flight controller with expandable ports. This will save you the hassle of upgrading too soon.
-
Beginner-Friendly: Simplicity is crucial. Look for models that offer a plug-and-play experience. Check for intuitive software that helps in tweaking settings without a steep learning curve.
Recommended Options
-
Betaflight F4: Known for its balance between simplicity and functionality, the Betaflight F4 is a fantastic choice for beginners. It offers excellent support for FPV systems and is compatible with most HD cameras.
-
iFlight SucceX-E: This model is favored for its affordability and ease of use, providing plenty of features for basic flying, including a clean setup for adding extras like a gimbal.
-
Holybro Kakute F7: With integrated features that simplify the connection process, it's great for those who may wish to scale up their flying capabilities gradually.
With these factors in mind, select a flight controller that aligns with your current experience level, while offering the flexibility to grow your skills and setup in the future. Enjoy your flying adventures!
Question 7.
What flight controller is recommended for upgrading a stock drone to add sensors, FPV, OSD, and GPS?
To upgrade a stock drone with additional features like sensors, FPV, OSD, and GPS, a programmable flight controller (FC) is essential.
Key Features to Consider in a Flight Controller:
-
Sensor Compatibility: Ensure the FC supports various sensors for enhanced drone capability.
-
FPV Support: Look for options that offer seamless integration with First-Person View (FPV) systems for an immersive flight experience.
-
On-Screen Display (OSD): An FC with OSD capability allows real-time telemetry and data display on your video feed.
-
GPS Modules: Choose a controller that can effectively interface with GPS modules for precise navigation and waypoint capabilities.
Recommended Flight Controllers:
-
Betaflight Controllers: Known for extensive community support and compatibility with advanced features.
-
Pixhawk Controllers: These offer robust sensor integration and are popular for serious hobbyists and professionals seeking GPS navigation.
-
Kiss FC: Ideal for users who prioritize simplicity and high performance, with streamlined settings for quick adjustments.
When selecting a flight controller, ensure it supports a wide range of expansion options to suit your customization needs. This flexibility will allow you to efficiently upgrade your drone’s capabilities without encountering compatibility issues.
Question 8.
What is the history of FPV drone flight controllers?
The Evolution of FPV Drone Flight Controllers
The journey of FPV (First Person View) drone flight controllers began in 2009 with an innovative use of technology. A creative maker combined the Wii Motion Plus Accessory with an Arduino board, paving the way for early drone control innovations. This clever adaptation sparked the birth of the Multiwii project. Ingeniously designed around an 8-bit Atmel processor, Multiwii developed its own distinct flight controller board, setting the stage for what would become a rapidly evolving technology.
Fast forward to 2013, a new milestone in flight controller development emerged. A developer known by the alias “timecop” innovated further by creating a flight controller featuring an ARM 32-bit processor. This project was named Naze32 and introduced the groundbreaking “Baseflight” software. The Naze32 was revolutionary, establishing a 35x35mm format with 30x30mm mounting holes, a standard that endures in the industry today.
The evolution continued in 2014 with the advent of Cleanflight, a modified version of Baseflight. Developed by an individual known as “Hydra,” Cleanflight marked an evolutionary leap in the 32-bit flight controller market, sparking a new wave of innovation. Manufacturers around the globe began creating their own variants, dramatically increasing the choice of flight controllers available to enthusiasts and professionals alike.
In 2015, the landscape shifted once again with the introduction of Betaflight, crafted by “BorisB.” Originally derived from Cleanflight's codebase, Betaflight focused on enhancing performance and introducing new features. Over time, Betaflight transformed significantly, establishing itself as a separate entity from Cleanflight. Today, Betaflight stands as the most popular firmware in the FPV drone community, consistently updated to push boundaries and improve user experience.
Through these pivotal developments, FPV drone flight controllers have transitioned from simple experimental devices to sophisticated technologies, central to the drone flying experience.
Question 9.
What are the key factors to consider when selecting a flight controller?
Key Factors to Consider When Selecting a Flight Controller
When diving into the world of flight controllers, you'll want to keep several important factors in mind to ensure you choose the right one for your drone setup:
Frame Space and Mounting
-
Compatibility: Check if the controller fits your frame. Options include 30×30, 25×25, or 20×20 mounting sizes.
Navigation and Sensors
-
GPS and Compass: If your setup requires GPS, ensure enough UARTs (typically three for digital builds: one each for VTX, RX, and GPS) are available. For a compass requirement, look for I2C pads (SDA and SCL).
Additional Features
-
LEDs and Buzzers: If you plan to use LEDs or a buzzer, verify that the flight controller supports these via dedicated pads.
-
Barometer: Opt for a flight controller with an integrated barometer if altitude data is critical, as finding external ones can be challenging.
Connectivity Options
-
Bluetooth: Decide if wireless configuration via Bluetooth, often manageable through apps like Speedybee, is necessary for your setup.
Power Considerations
-
Battery Compatibility: Make sure the controller can support the voltage and cell count of your chosen battery type.
Soldering Requirements
-
Solder Pad Size: Assess the pad sizes to ensure they are suitable for your soldering expertise.
Video Transmission Systems
-
Digital vs. Analog: Determine whether you need support for digital VTX systems, such as DJI, or analog systems. For analog, ensure the controller supports analog OSD with the AT7456E chip.
Connection Ports
-
USB Type: Consider the type of USB port available: USB-C is preferred for its durability and modern design over Micro USB.
By weighing these factors, you can confidently select a flight controller that meets your technical needs and enhances your drone's performance.
Question 10.
How should one choose the right flight controller for their drone?
How to Choose the Right Flight Controller for Your Drone
Selecting the right flight controller for your drone can be a complex process, but breaking it down into key considerations can simplify your decision. Here's what to evaluate:
1. Frame Compatibility
First, consider the available space on your drone’s frame. Flight controllers come in different sizes like 30×30, 25×25, or 20×20. Ensure that the mounting options align with your frame to avoid compatibility issues.
2. GPS and Sensor Requirements
If you're incorporating GPS, ensure there are enough UARTs (Universal Asynchronous Receiver-Transmitter) available. Typically, three UARTs are needed for a digital setup: one each for the video transmitter (VTX), receiver (RX), and GPS. For those requiring a compass, check for the presence of I2C connection pads (SDA and SCL).
3. Lighting and Sound Features
For drones requiring LED strips or buzzers, verify that the flight controller includes dedicated pads for these accessories. This allows for enhanced customization and visual alerts.
4. Barometer Inclusion
Consider whether a built-in barometer is necessary. Many flight controllers integrate this sensor, providing altitude data without the hassle of sourcing rare external barometers.
5. Wireless Configuration
Evaluate if you need Bluetooth functionality. This feature enables wireless configuration directly through smartphone apps, making setup and adjustments more convenient.
6. Battery Specifications
Determine the battery type and capacity your drone uses. Ensure the flight controller can accommodate the voltage and cell count of your chosen battery to prevent compatibility issues.
7. Solder Pad Accessibility
Assess the size of the solder pads. Ensure they are suitable for your level of soldering expertise, avoiding frustration or potential damage during installation.
8. Video Transmission System
Decide between a digital or analog VTX. For analog systems, a flight controller with an onboard OSD chip like the AT7456E is essential. For digital setups, ensure an available UART for connecting the VTX.
9. USB Connection Type
Lastly, review the type of USB connection. A USB-C port is generally preferable for its modern design and durability compared to the outdated Micro USB option.
By carefully considering these factors, you can select a flight controller that not only fits your drone’s build but also supports all the features you plan to utilize. This ensures optimal performance and a smoother flying experience.
Question 11.
What are the differences between APM and Pixhawk flight controllers?
Understanding the Differences Between APM and Pixhawk Flight Controllers
When diving into the world of drone flight controllers, APM and Pixhawk are two names that frequently emerge. While both serve as vital components in autopilot systems, they have distinct differences worth noting.
**1. Evolution and Development
-
APM (ArduPilot Mega): This older flight controller has been the stepping stone for many DIY drone enthusiasts. Built on an 8-bit microcontroller, the APM was groundbreaking in its time but is now considered outdated for complex applications.
-
Pixhawk: This is a newer generation in the drone ecosystem. Created to succeed where APM left off, Pixhawk is based on a more advanced 32-bit ARM processor, providing enhanced processing power and capabilities.
**2. Hardware and Performance
-
Processing Power: Pixhawk’s 32-bit processor allows for handling more complex tasks and providing smoother, more responsive control. In contrast, APM’s 8-bit technology limits its processing power, restricting its capability for newer features.
-
Sensors and Ports: Pixhawk offers a range of additional ports and supports multiple sensors, including enhanced GPS and telemetry options. This flexibility makes it ideal for more sophisticated drone setups. APM has fewer ports and lacks the enhanced support for modern peripherals, which can be limiting for more ambitious projects.
**3. Software and Compatibility
-
Firmware: Both APM and Pixhawk can run ArduPilot firmware—a powerful, open-source option. However, the continued innovation in this software increasingly favors the more capable hardware of Pixhawk. As a result, APM users may find themselves unable to utilize newer features introduced in updates.
-
Compatibility: Pixhawk is generally more compatible with various peripherals and accessories, thanks to its advanced hardware and software support. This allows users to integrate a wider array of components for tailored uses.
**4. Community and Support
-
User Base: While APM had a strong community during its prime, the shift towards more technologically advanced projects has seen the Pixhawk community grow substantially. This means more resources, tutorials, and support are available for Pixhawk users today.
-
Future Development: With newer versions and iterations regularly being released, Pixhawk is poised for ongoing development and support, allowing it to keep pace with technological advancements in UAV systems.
In summary, while APM served as an excellent introduction to flight controllers in its early days, Pixhawk represents the future with its superior processing power, expanded capabilities, and compatibility with advanced technology. For those looking to build or upgrade their drone setup, Pixhawk offers more flexibility and growth potential.
Question 12.
What are the recent developments in gyro technology for flight controllers?
Recent Developments in Gyro Technology for Flight Controllers
Gyro technology for flight controllers has seen significant advancements in recent years, enhancing stability and performance in both hobbyist and professional applications. Here's a look at the latest developments:
-
Enhanced Precision with New Models
Recent updates feature the integration of the BMI270 gyro. This model is celebrated for its low power consumption and precision, making it ideal for more efficient and responsive flight control systems. -
Advanced Features and Upgrades
The ICM42688P gyro is another cutting-edge addition. This upgrade offers improved noise performance and delivers faster data output, which contributes to smoother and more accurate flight experiences. -
Comprehensive Tutorials and Support
With the introduction of these advanced gyro models, tutorials and resources have been revised to facilitate a deeper understanding of their functionalities. These educational materials ensure that users can make the most of the new technology and adapt quickly to the enhancements.
In summary, the recent developments in gyro technology focus on increasing performance, efficiency, and user support, making flight controllers more reliable and easier to use than ever before.
Question 13.
How do gyroscopes and accelerometers in flight controllers impact drone stability?
Understanding the Role of Gyroscopes and Accelerometers in Drone Stability
When it comes to maintaining stability in FPV drones, two key components play a pivotal role: gyroscopes and accelerometers. These sensors are integral to the flight controller's ability to manage and stabilize the drone's flight.
Gyroscopes
Gyroscopes, often simply referred to as "gyros," are responsible for detecting angular velocity. Essentially, they measure how quickly and in which direction the drone is rotating. This allows the flight controller to react to changes in the drone's orientation in real time, ensuring that it maintains the desired flight path.
-
Manual Flying (Acro Mode): When flying in manual or acro mode, the drone relies solely on gyroscopes for balance and responsiveness. This mode is favored by experienced pilots who seek complete control over the drone's movements.
Accelerometers
Accelerometers measure linear acceleration, essentially capturing how fast the drone is moving in a straight line in any given direction. They complement the gyroscope by providing additional data that influences stability, especially in assisted flying modes.
-
Assisted Flying (Angle Mode): In self-leveling modes like angle mode, both gyroscopes and accelerometers work together. The accelerometer helps the drone maintain level flight by adjusting altitude and direction automatically, making it more suitable for beginners.
Impact on Drone Stability
The combination of gyroscopes and accelerometers allows the flight controller to balance responsiveness with stability. In manual modes, gyros offer precision control, enabling skilled maneuvers, while in assisted modes, the accelerometers contribute by providing smooth and stable flight experience.
By effectively measuring rotations and directional shifts, these sensors enable drones to adapt dynamically to pilot inputs and environmental changes, ensuring a steady and controlled flight.
Question 14.
How can one configure and tune a flight controller for better flight characteristics?
How to Configure and Tune a Flight Controller for Optimal Flight Performance
Configuring and tuning your flight controller is crucial for enhancing your drone's flight characteristics. Here's a step-by-step guide to get you started:
1. Choose Your Configuration Tool
You can configure your flight controller using a computer, smartphone, or radio controller. Each method offers a unique user interface (UI) and different parameters to adjust. Familiarize yourself with the chosen UI, as similar interfaces can still yield varying flight results.
2. Understand Key Parameters
Before diving into tuning, it's essential to know the basic parameters you'll be adjusting:
-
PID (Proportional, Integral, Derivative)
-
Rates/Expo
-
Other Custom Parameters
These settings work together to fine-tune your drone's response and behavior.
3. The Tuning Process
Tuning involves adjusting the above parameters to achieve your desired flight characteristics:
-
PID Tuning: This is about balancing the drone's responsiveness and stability. Experiment with these values to find a balance that suits your flying style.
-
Rates and Expo: Tweaking these settings adjusts how your drone responds to control inputs. Higher rates mean quicker responses, while expo softens stick center sensitivity for more precise control.
4. Testing and Iteration
After making initial adjustments, test your drone's performance in a safe environment. Observe its behavior:
-
Is it too twitchy or sluggish?
-
Does it drift or oscillate?
Based on these observations, continue to tweak the settings until you achieve optimal performance.
5. Trial and Error
Be patient and keep experimenting. Every drone and pilot preference differs, requiring unique tuning settings. This process might take some time, but the payoff is a drone that flies exactly as you wish.
By following these steps, you'll be well on your way to configuring and tuning your flight controller for enhanced drone performance. Remember, the key is practice and patience!
Question 15.
What are the different types of flight controllers available for drones?
Exploring Drone Flight Controllers: What Are Your Options?
When it comes to drone flight controllers, understanding the different types can help you choose the best setup for your needs. Here's a breakdown of the main categories:
1. Multirotor Flight Controllers
Multirotor setups are popular due to their flexibility and are typically divided into two types: the All-in-One (AIO) Flight Controller and the Regular Flight Controller with ESC Stack.
-
All-in-One (AIO) Flight Controllers:
-
Compact Design: These integrate the Electronic Speed Controller (ESC) onto the same board as the flight controller.
-
Space-Saving: Ideal for drones where saving space and reducing weight are priorities.
-
Trade-offs: While compact, they might compromise on robustness. The smaller components can lead to less effective heat dissipation.
-
-
Regular FC with ESC Stack:
-
Two-Board System: This setup uses separate boards for the flight controller and ESC.
-
Enhanced Durability: Typically more reliable for handling thermal stress thanks to larger components which dissipate heat more effectively.
-
Choosing between these two often boils down to your specific needs—whether you're looking for a lightweight design or a sturdy, reliable system.
2. Plane/Wing Flight Controllers
For fixed-wing drones, the Plane/Wing Oriented Flight Controllers are more suitable. These controllers are tailored to manage the aerodynamic nuances of a fixed-wing flight, providing specific features that address the longitudinal dynamics of winged setups.
Key Considerations
When selecting a flight controller, consider:
-
Space and Weight Requirements: Smaller drones might benefit from AIO FCs, whereas larger builds can accommodate the robust regular FC/ESC stack.
-
Durability and Heat Management: If your drone is likely to experience intense usage, the regular FC/ESC stack may offer better longevity.
Understanding these options ensures you pick a controller that aligns perfectly with your drone's design and intended use. Happy flying!
Question 16.
Which flight controller is suitable for lifting an unbalanced payload of 5 pounds?
When it comes to selecting a flight controller (FC) for lifting an unbalanced 5-pound payload, it's crucial to choose one capable of maintaining stability and performance under such conditions. Here's what to consider:
Key Features to Look for:
-
Stability and Control Algorithms: Ensure the flight controller has advanced stabilization features. Look for controllers with sophisticated PID tuning and adaptive control algorithms designed to manage imbalance efficiently.
-
Payload Support: Opt for a flight controller explicitly rated to handle at least a 5-pound payload. Some controllers are engineered to manage heavier loads with integrated support systems.
-
Sensor Suite: A robust set of sensors, including accelerometers, gyroscopes, and barometers, will help the controller adjust in real-time for any shifts in weight distribution.
-
Customizability: Choose a controller that offers customization in terms of input sensitivity and motor control settings. This allows for fine adjustments to counteract any imbalance during flight.
-
Compatibility: Verify that the flight controller is compatible with your drone's frame and motors, as well as any additional equipment you plan to use.
Top Contenders:
-
Pixhawk Series: Known for versatility and reliability, featuring comprehensive control over flight dynamics with excellent support for unbalanced loads.
-
DJI Naza: Well regarded for its ease of setup and robust performance in handling payloads with varying distributions.
-
Ardupilot APM: Offers a plethora of tuning options to manage payload-induced imbalance, with a strong community backing for customized solutions.
Operational Tips:
-
Balanced Propellers and Motors: Ensure that propellers and motors are balanced to help the controller manage uneven weight distribution.
-
Tuning Guidance: Engage in thorough tuning sessions. Adjust PID settings in a safe environment to optimize performance for your specific unbalanced payload scenario.
Selecting the right flight controller involves balancing these features and requirements with your particular drone setup to ensure stability and successful lift-off while carrying an unbalanced 5-pound payload.
Question 17.
What flight controller should be used for real-time mapping with a drone?
When selecting a flight controller for real-time mapping with a drone, several factors need consideration to ensure optimal performance and reliability. Here's a breakdown to guide you:
Key Attributes to Consider
-
Processing Power and Compatibility
-
Opt for a flight controller with sufficient processing power to handle the data-intensive task of real-time mapping. The controller should be compatible with GPS modules and other sensors required for high-precision mapping.
-
-
Sensor Integration
-
Ensure the flight controller supports seamless integration with external devices like cameras, LiDAR, or RTK GPS for enhanced accuracy. This is crucial for collecting detailed mapping data during flights.
-
-
Software and Firmware Support
-
A controller that is supported by open-source firmware (like ArduPilot or BetaFlight) can offer greater customization and community support. This flexibility allows you to tailor features specifically for mapping tasks.
-
-
Stability and Control
-
Choose a flight controller known for its stable flight performance, especially in various environmental conditions. This ensures smooth data collection and minimal errors during mapping missions.
-
-
Connectivity Options
-
Consider devices with advanced connectivity features, such as Bluetooth or Wi-Fi, which can facilitate ease of data transfer and remote control capabilities.
-
Recommended Options
-
Holybro Kakute Series: Known for robust performance with a variety of sensors and modules.
-
Pixhawk: Offers extensive support for professional mapping with ample documentation and community forums.
-
Omnibus F4 Pro: A cost-effective option with sufficient processing ability for small to medium-scale mapping projects.
Final Thoughts
Evaluate your specific project needs, including the size and weight constraints of your drone, before making a decision. Ensure that the selected flight controller not only meets the technical requirements but also fits within your budget and skill level. By aligning these factors, you’ll be equipped to carry out efficient and accurate real-time mapping missions with your drone.
Question 18.
What are the recommended open-source flight controllers for replacing a Cheerson CX-20 FC?
If you're looking to replace the flight controller on a Cheerson CX-20 with an open-source alternative, there are several excellent options to consider. These alternatives provide enhanced customization and better performance, making them popular choices among drone enthusiasts.
Top Open-Source Flight Controllers for Cheerson CX-20
-
Pixhawk
-
Features: Known for its robust hardware and extensive features, the Pixhawk provides reliable performance and supports a wide range of sensors and accessories.
-
Compatibility: It easily integrates with popular open-source software like ArduPilot and PX4, offering advanced flight modes and options for telemetry.
-
-
DJI Naza M Lite
-
Features: While primarily associated with DJI, the Naza M Lite is favored for its simplicity and stability. It offers basic GPS functionality and a solid performance for beginners.
-
Compatibility: Although not fully open-source, it’s an affordable and straightforward option for those preferring a blend of ease and functionality.
-
-
OpenPilot CC3D
-
Features: The CC3D is compact and valued for its ease of use, making it perfect for basic applications. It's a cost-effective choice for those new to customization.
-
Compatibility: It pairs well with OpenPilot and LibrePilot software, offering a seamless configuration process.
-
-
Kakute F7
-
Features: Offering cutting-edge technology, the Kakute F7 supports the latest protocols and sensor integration. It provides smooth performance for advanced users.
-
Compatibility: It's designed to work effortlessly with Betaflight and iNav, enhancing your drone's agility and responsiveness.
-
Considerations
-
Ease of Installation: Evaluate how easy it is to install and configure the flight controller with your existing CX-20 setup.
-
Software Compatibility: Check for compatibility with your preferred open-source platform to ensure you have access to the features you need.
-
Budget: Flight controllers come in various price ranges, so choose one that fits within your budget while meeting your performance expectations.
By choosing any of these options, you can significantly upgrade your Cheerson CX-20’s capabilities, leading to a more flexible and customizable flying experience.
Question 19.
What is the best flight controller for a drone with three motors and one servo?
Choosing the best flight controller for a drone equipped with three motors and one servo can be crucial for optimal performance. Here's a comprehensive guide to help you make the right choice.
Key Factors to Consider
-
Compatibility: Ensure the controller is compatible with a tricopter setup. Tricopters require specialized configurations due to their unique motor and servo combination.
-
Firmware Support: Look for controllers that support popular firmware options like Betaflight or iNav, as these offer flexibility and robust features for tuning.
-
Built-in Features:
-
Stabilization: A good controller should offer advanced stabilization algorithms to ensure smooth flight.
-
PID Tuning: Adjustable PID settings are essential for fine-tuning flight characteristics.
-
-
Connectivity:
-
A wide range of input/output options will cater to various sensors and additional components.
-
Ensure it supports your preferred remote control system and telemetry options.
-
-
Ease of Setup: Some flight controllers come with excellent documentation and community support, making them easier for both beginners and advanced users.
-
Size and Weight: Depending on your drone's frame, you may need a lightweight and compact flight controller to avoid adding unnecessary weight.
Recommended Options
-
Pixhawk: Known for its versatility and comprehensive community support, Pixhawk is a strong contender for tricopters.
-
Kakute F7: Offers high processing power and built-in features that make it suitable for complex drone configurations, including those with servos.
-
F4 and F3 Controllers: Many of these models accommodate tricopter signals and offer customizable firmware options.
Final Thoughts
Investigate online reviews and forums to see how other users have configured their tricopters. By balancing features with your personal requirements, you can select a flight controller that delivers reliability and excellent performance for your unique drone setup.
Question 20.
What new features and integrations have been added to flight controllers over time?
Flight controllers have seen a remarkable evolution over the years, integrating a host of cutting-edge features and enhancements aimed at refining drone performance and user experience.
Enhanced Stability and Performance
Initially, flight controller firmware focused on stabilizing drones and improving flight dynamics. Over time, optimizations in PID controllers and sensor fusion algorithms were introduced. These improvements resulted in smoother flights and more responsive maneuvers, significantly enhancing the overall performance.
Advanced Telemetry and Sensors
Modern flight controllers have capitalized on telemetry advancements, enabling real-time feedback on drone stats such as battery life, signal strength, and flight distance. Integrating GPS modules and barometers has opened new possibilities for features like return-to-home functions, altitude hold capabilities, and precise navigation.
Improved Interfaces and User Configurability
The inclusion of user-friendly interfaces has made it easier for hobbyists and professionals alike to configure flight controllers. Graphic user interfaces (GUIs) allow for straightforward tuning and customization of drone settings. Moreover, APIs have facilitated third-party app development, extending customization possibilities further.
Increased Connectivity Options
Integrations now frequently include support for a variety of connectivity options such as Bluetooth and Wi-Fi. These additions have transformed the ease with which users can update firmware, control drones remotely, and streamline data transfer between devices and controllers.
Enhanced Autonomy Features
Recent developments have introduced advanced autonomy features. Intelligent flight modes such as waypoint navigation, follow-me, and automated take-off and landing are possible due to sophisticated software and hardware integrations. These add layers of intelligence, making drones more self-sufficient and adaptable to complex flight scenarios.
Comprehensive Data Logging and Analysis
Finally, modern flight controllers are equipped with robust data logging tools. These tools allow users to analyze flight data post-flight, providing insights into performance metrics that can be used to further refine and optimize flight configurations.
Collectively, these advancements demonstrate a continuous push towards more intelligent, versatile, and user-oriented drone systems, setting a high standard for future developments.
Question 21.
How do blackbox logs help in tuning and troubleshooting drones?
How Blackbox Logs Enhance Drone Tuning and Troubleshooting
Blackbox logs play a crucial role in both tuning and troubleshooting your drone, enabling you to elevate its performance and identify issues with ease. Let’s explore how this useful tool can help you get the most out of your flying experience.
Recording Flight Data: The Basics
You can capture flight data by utilizing two main methods—integrated flash memory or an SD card. Each method comes with its own advantages:
-
Flash Memory:
-
Cost-effective option
-
Typically offers about 16MB of storage
-
Enough for 5 to 10 minutes of flight recordings
-
Note: Download speeds can be slow
-
-
SD Card:
-
Requires a flight controller with an onboard SD card logger or an external SD card reader connected via UART
-
Enables extended recording sessions
-
Provides instant log access when inserted into a card reader
-
The Benefits for Experienced Pilots
For those who have clocked countless flight hours, blackbox logs are indispensable. Here's why:
-
Optimized Performance:
-
Precise data makes it easier to fine-tune your drone
-
Helps extract maximum efficiency and performance from your equipment
-
-
Comprehensive Diagnostics:
-
Allows for in-depth analysis of any flight issues
-
Facilitates detailed troubleshooting that is otherwise difficult to achieve
-
-
Long-Term Data Management:
-
An SD card setup allows year-long data storage without frequent deletions
-
Helps build a comprehensive database of flight logs for ongoing analysis
-
By effectively utilizing blackbox logs, you can address performance shortcomings and intricate technical issues with greater clarity. Whether you're looking to push your drone to its ultimate limits or simply ensure smoother flights, blackbox logs are an essential tool for serious drone enthusiasts.
Question 22.
What are the different processors used in flight controllers, and how do they compare?
Understanding the Processors in Flight Controllers
Flight controllers are essential components in drones, relying heavily on microcontroller units (MCUs) to function effectively. These MCUs not only store firmware but also execute complex calculations. In the rapidly evolving world of drone technology, understanding these processors is crucial.
Common Types of MCUs
Supported Microcontrollers
-
F4 Series: Known for their balance of speed and memory, F4 processors operate at 168MHz and offer either 512KB or 1MB of memory. These processors are well-suited for most tasks in modern flight controllers.
-
F7 Series: With a faster clock speed of 216MHz and up to 1MB of memory, F7 series MCUs are ideal for more demanding applications where processing speed is critical.
-
H7 Series: These are top-of-the-line processors, boasting speeds up to 480MHz and memory options of 1MB to 2MB. They deliver unparalleled performance for the most advanced flight controller functions.
Unsupported Microcontrollers
-
F1 and F3 Series: Earlier versions, these processors are now obsolete in many applications due to their limited memory capacities (128KB for F1 and 256KB for F3). As firmware and feature demands grow, these processors fail to meet the necessary requirements.
Performance vs. Memory
Choosing the right processor isn’t just about speed; memory capacity plays a critical role. In fact, slower processors like the F405 might outperform faster ones such as the F722 in the long run if they offer greater memory capacity. This flexibility allows users to tailor their firmware, keeping the code size efficient for processors with lesser memory.
The Changing Landscape
Traditionally, certain brands dominated the flight controller space, but the landscape is shifting. Newer entrants are offering alternatives that are both accessible and budget-friendly, providing more options for technology enthusiasts and professionals alike.
Choosing the right processor for a flight controller involves balancing speed and memory. While newer models offer increased capabilities, even older models can find use if chosen wisely for specific applications. Understanding these differences can greatly enhance the performance and longevity of your flight controllers.
Question 23.
What is flight controller firmware and how does it impact drone performance?
Understanding Flight Controller Firmware and Its Impact on Drone Performance
In the world of drones, flight controller firmware plays a crucial role in shaping how your drone performs. Firmware is the software that runs on the flight controller hardware, acting as the brain of your drone. It translates your commands into precise movements by managing everything from stabilization to complex flight patterns.
How Firmware Affects Drone Performance
-
Stability and Control: Different firmware options offer varying levels of flight stability and control. For instance, some are optimized for acrobatic maneuvers, appealing to those who prioritize fluid flight and responsiveness.
-
Feature Set: The capabilities of your drone can be expanded or limited by the firmware you choose. Some options offer advanced features like GPS navigation and autonomous flight, which are essential for specific applications such as aerial mapping or long-distance travel.
-
User Community and Support: The popularity of certain firmware affects the level of community support you can expect. A larger user base means more resources, tutorials, and troubleshooting support are available, making it easier for beginners to get started and for seasoned pilots to find solutions to complex issues.
-
Hardware Compatibility: It's crucial to choose firmware that is compatible with your flight controller board. Some firmware options support a wide range of hardware, providing more flexibility in customizing your drone's configuration.
Popular Firmware Options
-
Performance-Oriented Firmware: Some firmware variants are designed to enhance flight dynamics, making them ideal for racing drones and those interested in agility and speed.
-
GPS and Automation-Focused Firmware: For pilots interested in missions requiring GPS waypoints or automated flights, other firmware options prioritize these capabilities, making them suitable for tasks like surveying or exploring unfamiliar territories.
Selecting the right firmware for your drone involves considering what kind of flying experience you aim for, the features you need, and the level of community support you prefer. Once you’ve settled on a choice, ensure that your flight controller board is compatible to fully leverage the firmware’s capabilities.
Question 24.
How do flight controllers connect to other drone components like ESC, GPS, and cameras?
How Flight Controllers Connect to Drone Components
When assembling an FPV drone, understanding how to connect the flight controller (FC) to other vital components is crucial. Each flight controller may have different solder pad layouts, but the principles of connection remain consistent.
Connecting the ESC (Electronic Speed Controller)
-
Power and Ground Wires: Connect the power and ground wires from the ESC to the corresponding pads on the FC to supply the necessary power for operation.
-
Signal Wires: Each ESC provides a signal wire that must connect to the designated signal pads on the FC to enable control over motor speed.
Integrating GPS
-
UART (Universal Asynchronous Receiver-Transmitter): GPS modules typically connect through a UART interface. Locate the TX and RX UART pads on your flight controller and solder the GPS module's wires accordingly for data transmission.
-
Power and Ground: Ensure power and ground connections are made from the GPS to the appropriate pads on the FC to operate the GPS.
Attaching Cameras
-
Signal Connection: Connect the camera's video out wire to the video-in pad on the FC. This allows the camera feed to be processed and transmitted through the drone.
-
Power and Ground: Cameras often need their power source, which should be connected to the relevant pads on the FC, ensuring stable operation.
General Tips
-
Refer to the FC Manual: Always refer to your flight controller's manual for precise pad locations and additional settings specific to your model.
-
Designate Cable Pathways: Keep your wiring clean and organized to avoid confusion during maintenance and to minimize electromagnetic interference.
In summary, while every flight controller may differ in layout, the way they connect to components like ESCs, GPS modules, and cameras follows similar logic across devices. Understanding the functions of each ECU, maintaining clear wiring paths, and carefully consulting your equipment manuals will streamline your drone assembly process.
Question 25.
What are the advantages and disadvantages of AIO (All-in-One) flight controllers?
Advantages and Disadvantages of AIO (All-in-One) Flight Controllers
Advantages of AIO Flight Controllers:
-
Space Efficiency: All-in-One (AIO) flight controllers combine the electronic speed controller (ESC) and flight controller on a single board. This compact design saves space, making it an ideal choice for smaller drones where every millimeter counts.
-
Reduced Weight: With fewer boards, an AIO setup typically weighs less than traditional stacks. This is advantageous for micro drones and racing drones, where minimizing weight can enhance performance and agility.
-
Simpler Installation: Having everything integrated onto one board simplifies the installation process. With fewer wires and connections, setup is quicker and often cleaner, reducing potential points of failure.
Disadvantages of AIO Flight Controllers:
-
Heat Management: The compact nature of AIO boards limits heat dissipation. Since the ESCs are on the same board, they tend to use smaller FETs, which can struggle with heat management, especially during demanding operations.
-
Durability Concerns: AIO boards might not be as robust as traditional separate stacks. In the case of component failure, the entire board might need to be replaced, rather than just the faulty part.
-
Performance Limitations: While suitable for micro and lightweight drones, AIOs might not handle high currents as efficiently as larger, separate ESC boards. This can be a limitation for users requiring maximum power delivery and reliability.
Ultimately, the decision between an AIO flight controller and a traditional stack depends on your specific needs. If maximizing space and weight reduction is critical, an AIO is typically the way to go. For those prioritizing performance and ease of maintenance, a traditional flight controller and ESC setup might be preferable.
Question 26.
What advice is there for creating a drone with collision avoidance for skyrise building maintenance?
Creating a drone capable of performing maintenance on skyscrapers while avoiding collisions is an exciting and challenging project. Here’s some advice to consider when designing such a drone:
Choosing the Right Flight Controller
-
Human-Operated Drones with Collision Avoidance
-
Precision Control: Select flight controllers that offer high-precision controls, allowing operators to navigate safely in tight spaces.
-
Sensor Integration: Equip your drone with ultrasonic, infrared, or LiDAR sensors. These sensors help detect the proximity of nearby surfaces, providing real-time data to keep the drone at a safe distance.
-
User Interface: Ensure the controller comes with a user-friendly interface that provides feedback on the drone’s distance from the building, enabling the operator to make rapid adjustments.
-
-
Computer-Operated Drones with Collision Avoidance
-
AI and Machine Learning: Incorporate AI-driven systems to enhance autonomous navigation. Machine learning algorithms can be trained to recognize patterns and obstacles, allowing the drone to decide the best flight path.
-
Advanced Software: Use software with environmental mapping capabilities. This will let your drone create a 3D model of its surroundings and plot a collision-free course.
-
Redundancy Systems: Install redundancy systems to handle sensor failure. If one sensor malfunctions, others can compensate to ensure continuous safe operation.
-
Additional Considerations
-
Battery Life and Payload: Balance the drone’s payload with its battery life. Maintaining adequate power is crucial, especially when carrying maintenance tools.
-
Wind Resistance: Choose a drone with robust stabilization features to deal with high winds often encountered at significant heights.
-
Regulatory Compliance: Ensure your drone adheres to local aviation regulations and safety standards. Always conduct thorough testing in controlled environments before operating near buildings.
By focusing on these elements, you can develop a reliable and efficient drone system for skyrise maintenance that minimizes the risk of collisions and maximizes operational effectiveness.
Question 27.
What could cause a KK board to restart when the load increases, and is there a specific voltage that triggers this?
Possible Causes of KK Board Restarts Under Load
Experiencing restarts with your KK 2.1.5 flight controller when increasing the throttle can be frustrating. Let's break down potential causes and explore the specific voltage conditions that might trigger these issues.
Common Triggers for Board Restarts
-
Voltage Drop:
-
As you increase throttle, there's a higher energy demand on your battery. If your battery's discharge rate can't keep up, a voltage drop will occur. Flight controllers like the KK 2.1.5 generally require a stable voltage to function effectively.
-
If the voltage drops below a certain threshold—typically around 5-6 volts for many controllers—it may result in a restart. In your case, it's restarting at 6.1 volts, suggesting this could be close to the critical point for your setup.
-
-
Battery Health:
-
Aging batteries or those with low capacity may not provide the required power under load. Ensure your battery is in good condition and capable of sustaining higher current draws.
-
-
Wiring and Connections:
-
Loose or inadequate connections can exacerbate voltage drops. Double-check your solder joints, connectors, and wiring for any signs of wear or poor contact.
-
-
Power Distribution Board (PDB):
-
If using a PDB, ensure it effectively manages and distributes power to all electronic components. Any inefficiency here can lead to power issues under load.
-
Solutions and Recommendations
-
Battery Upgrade:
-
Consider using a battery with a higher C-rating (discharge rate) to better handle power requirements.
-
-
Voltage Regulator:
-
Implement a voltage regulator to maintain a stable power supply to the KK board, ensuring it remains above the critical threshold.
-
-
Check and Improve Connections:
-
Secure all connections and ensure your power lines are sufficiently rated for your setup's current needs.
-
-
Capacitors:
-
Installing low ESR capacitors on the power lines can smooth out voltage fluctuations, potentially preventing restarts.
-
Understanding these factors could help prevent future issues and lead to a seamless flying experience with your quadcopter.
Question 28.
What are the challenges and considerations in building a DIY drone with certain specifications like obstacle avoidance and a 30-minute flying time?
Building a DIY drone that matches specific requirements, such as obstacle avoidance and a 30-minute flight duration, can be both rewarding and challenging. Here’s a breakdown of the key challenges and considerations:
Key Specifications
-
Flying Time: Achieving a 30-minute flying time requires an efficient energy management system, which means selecting the right battery type and size. You’ll need to balance capacity with weight, as heavier batteries can reduce the efficiency and agility of your drone.
-
Range and Altitude: To achieve a 5-kilometer range and a maximum altitude of at least 300 meters, you'll need a robust communication system. This includes transmitters and receivers that are both powerful and reliable.
Structural Considerations
-
Compact Design: Crafting a drone that is either foldable or compact can be tricky. The design must ensure that the drone remains sturdy while still allowing for easy storage and transport.
-
Camera Stabilization and FPV (First-Person View): Incorporating an optically stabilized camera or a gimbal is vital for capturing smooth, high-quality footage. This involves additional weight and power consumption considerations.
Technology and Features
-
Obstacle Avoidance: Implementing sensor-based obstacle avoidance requires careful selection and integration of sensors such as LIDAR or ultrasonic, which add to the complexity and cost.
-
GPS and Autonomy: Integrating a reliable GPS for precision navigation and 'Follow Me' functionality requires programming and electronic expertise.
Performance Preferences
-
Smoothness Over Speed: Calibrating the electronic speed controllers and tuning the flight controller settings is essential to achieve desirable flight smoothness, rather than focusing purely on speed.
Practical Hurdles
-
Skill and Knowledge: Building a high-performing drone necessitates an in-depth understanding of electronics, aerodynamics, and software. This includes soldering skills, programming proficiency, and familiarity with flight dynamics.
-
Financial Investment: Although DIY projects can be more affordable, achieving the desired specs may require investment in quality components, potentially offsetting savings.
Conclusion
The journey of building a DIY drone is a complex task that blends technical skill with creative problem-solving. It involves meticulous planning and a willingness to experiment, making it crucial to consider both personal skill level and budgetary constraints before diving in.
Question 29.
Is it possible to achieve hover abilities without a GPS, and what settings are required?
Achieving Hover Stability Without GPS
Yes, it's possible to achieve hover capabilities without relying on a GPS. To do this, you'll need to adjust certain settings in your flight controller to help stabilize the drone when you release the controls. Here's how you can set it up:
1. Flight Controller Mode
-
Altitude Hold Mode: This mode uses barometer data to maintain a consistent altitude, helping your drone hover at a set height when you release the throttle.
-
Level Mode (Angle Mode): This stabilizes the drone by automatically leveling it when you let go of the controls, which can help maintain a hover.
2. Tuning the PID Controller
Adjusting the PID (Proportional, Integral, Derivative) settings is crucial for stability:
-
P (Proportional): This controls the response to current axis error. Higher values can provide a sharper response but may lead to oscillations.
-
I (Integral): This helps eliminate any residual steady-state error but can cause overshooting if set too high.
-
D (Derivative): This dampens the response to decrease overshooting. Accurate tuning is key for a stable hover.
3. Calibration
-
Accelerometer Calibration: Ensures the controller correctly interprets the drone's orientation, a critical step for effective hovering.
-
ESC Calibration: Matching the throttle range ensures smooth and predictable motor output, assisting in stability.
4. Additional Sensors
While you mentioned you're avoiding GPS, adding sensors like optical flow sensors or ultrasonic sensors can help maintain horizontal stability and prevent drift.
Tips for Better Stability
-
Practice in Low Wind Conditions: Even with perfect tuning, weather influences hover stability.
-
Regular Maintenance: Inspect motor mounts, props, and the rest of the hardware for any wear or damage that could affect performance.
In summary, while GPS can enhance stability, you can achieve a reliable hover with proper mode selection, PID tuning, and utilizing additional sensors. Experiment with these settings to find what works best for your specific setup and flying conditions.
Question 30.
What issues can arise from upgrading flight controller firmware to version 4.5.0?
Potential Issues with Upgrading Flight Controller Firmware to Version 4.5.0
Upgrading your flight controller firmware to version 4.5.0 can lead to specific operational challenges. One notable issue is that the motors may not spin properly if the bidirectional Dshot function isn't enabled. This feature is crucial for motor performance, and without it, you might experience unexpected behavior from the controller.
Key Problems with Version 4.5.0:
-
Motor Operation: If bidirectional Dshot is off, motor spin is inhibited. This can prevent your drone from operating correctly.
-
Compatibility Issues: Certain configurations that worked in previous versions may not be supported, leading to performance drops or failure to operate.
Suggested Solutions:
-
Downgrade to Version 4.4.3: To alleviate these problems, reverting back to firmware version 4.4.3 has shown to resolve the motor issue.
-
Double-Check Settings: Ensure all required features like bidirectional Dshot are enabled if you continue using 4.5.0.
Developers are aware of these complications, and it's advisable to stay informed on updates or fixes that may be released in the future.
Question 31.
How do you ensure a flight controller is compatible with digital or analog VTX systems?
How to Ensure Your Flight Controller is Compatible with VTX Systems
When setting up your flight controller to work with a video transmitter (VTX), compatibility is key. Whether you choose a digital or analog VTX system, here's how you can ensure seamless integration:
For Analog Systems
-
Check for OSD Compatibility:
-
Your flight controller needs to support on-screen display (OSD) to provide in-flight information. Look for the AT7456E chip, which indicates that the flight controller can handle analog OSD setups.
-
-
Port Availability:
-
Verify that there is an available UART port for VTX telemetry. This will allow data such as channel and power level adjustments directly from your flight controller.
-
For Digital Systems
-
UART Port Readiness:
-
Ensure there's a spare UART port allocated for the digital VTX. Digital systems often require this connection for flight data transmission and other functionalities like changing frequencies.
-
-
Firmware Updates & Compatibility:
-
Keep your flight controller’s firmware updated to ensure it supports the latest digital VTX technologies. Compatibility can evolve with software updates, which may enhance performance and introduce new features.
-
By following these steps, you can guarantee a smooth operation between your flight controller and VTX, optimizing your drone for either analog or digital visual systems.
Question 32.
What role does a barometer play in a flight controller?
What Role Does a Barometer Play in a Flight Controller?
A barometer in a flight controller significantly enhances the stability and accuracy of your drone's flight. Primarily, it measures atmospheric pressure to estimate altitude, offering precise elevation data.
Key Benefits of a Barometer:
-
Enhanced GPS Accuracy: When used alongside GPS, it refines altitude readings, making modes like GPS Rescue more reliable.
-
Improved Altitude Hold: It stabilizes the drone at a set height without manual input, which is crucial for tasks requiring steady hovering.
-
Smooth Flight Experience: By providing continuous altitude data, it helps in managing changes in height subtly, reducing abrupt movements.
While beneficial, a barometer is not essential for basic flight performance. However, for those seeking precision and stability, particularly in autonomous or photography-centric flights, it is a valuable addition.
Question 33.
How does ESC compatibility influence the choice of flight controllers?
How Does ESC Compatibility Influence the Choice of Flight Controllers?
When selecting a flight controller for your drone, ESC compatibility is a key consideration that can significantly affect your decision.
Stacked Convenience vs. Custom Configurations
Many contemporary setups offer a 4-in-1 ESC
and flight controller bundle, ensuring a seamless and user-friendly experience. These stacks are typically designed for easy installation, allowing for a straightforward, plug-and-play setup.
However, if you're mixing and matching components from different manufacturers, caution is necessary. While components from various brands are often designed to be compatible, discrepancies in pinout configurations can arise. This means the wiring layout might not match up perfectly.
Why Pinout Matters
Misaligned pinouts require a careful rearrangement of wires within the harness. This task can become quite the conundrum. Before connecting these crucial components, it’s essential to verify pinout compatibility to avoid wiring mishaps. Incorrect wiring can lead to significant damage, such as frying your flight controller as soon as power runs through it.
Checklist for Ensuring Compatibility
To make informed decisions, here’s a quick checklist to follow:
-
Review Specifications: Go over the technical specifications of both the ESC and flight controller to ascertain compatibility.
-
Pinout Verification: Double-check the pinout diagrams for both components.
-
Harness Adjustment: Be prepared to adjust the wiring if necessary to match pinouts.
-
Test Safely: Always conduct a preliminary test after setup to ensure everything functions as expected.
By prioritizing these steps, you'll ensure a smooth assembly process and potentially extend the lifespan of your components, leading to a more efficient and enjoyable flying experience.
Question 34.
What are the most common gyroscope models used in flight controllers and their characteristics?
When it comes to flight controllers for FPV drones, several gyroscope models are frequently used, each offering distinctive characteristics and capabilities. These gyroscopes are primarily produced by two leading manufacturers and connect to processors via SPI or I2C communication protocols. Here’s a breakdown of the key models and their features:
Common Gyroscope Models and Their Features
-
MPU6000
-
Communication Protocols: SPI, I2C
-
Max. Sampling Frequency: 8KHz
-
-
MPU6050
-
Communication Protocol: I2C
-
Max. Sampling Frequency: 4KHz
-
-
MPU6500
-
Communication Protocols: SPI, I2C
-
Max. Sampling Frequency: 32KHz
-
-
MPU9150
-
Communication Protocol: I2C (Integrates a magnetometer)
-
Max. Sampling Frequency: 4KHz
-
-
MPU9250
-
Communication Protocols: SPI, I2C (Similar to MPU6500 with a magnetometer)
-
Max. Sampling Frequency: 32KHz
-
-
ICM20602
-
Communication Protocols: SPI, I2C
-
Max. Sampling Frequency: 32KHz
-
-
ICM20608
-
Communication Protocols: SPI, I2C
-
Max. Sampling Frequency: 32KHz
-
-
ICM20689
-
Communication Protocols: SPI, I2C
-
Max. Sampling Frequency: 32KHz
-
-
ICM42688P
-
Communication Protocols: SPI, I2C
-
Max. Sampling Frequency: 32KHz
-
-
BMI270
-
Communication Protocols: SPI, I2C
-
Max. Sampling Frequency: 6.4KHz
-
Understanding Protocol Preferences
-
SPI is the preferred communication protocol among modern flight controllers due to its ability to support higher refresh rates, crucial for fast-paced drone maneuvers.
-
I2C is more limited, with a maximum effective sampling frequency of 4KHz, which is why models supporting only I2C, such as MPU6050 and MPU9150, are less favored.
When choosing a gyroscope for your flight controller, it's important to consider both the communication protocol and the maximum effective sampling frequency it supports. This ensures optimal performance and responsiveness of your FPV drone.
Question 35.
How does the mounting pattern of a flight controller affect its compatibility with drone frames?
The mounting pattern of a flight controller plays a pivotal role in determining its compatibility with drone frames. Essentially, this pattern specifies the spacing between the mounting holes on the flight controller, which must align precisely with the corresponding holes on the drone frame.
Here’s how it works:
-
Size Compatibility with Frame:
-
Larger drones, typically those with 5-inch to 7-inch propellers, often accommodate bigger mounting patterns, such as 30.5×30.5mm. This size provides the stability and support needed for the added weight and power of larger frames.
-
Conversely, compact drones, especially those used for racing or freestyle, often require smaller patterns like 25.5×25.5mm or 20×20mm. These smaller sizes help reduce weight and maintain agility.
-
-
Frame Support:
-
The frame of your drone will dictate the compatible mounting pattern. It's crucial to check the specifications of your frame to ensure that it matches the flight controller's pattern. A mismatch could lead to the need for adapters or the inability to mount the controller securely, which could affect flight performance.
-
-
Weight and Space Considerations:
-
Opting for a smaller mounting pattern reduces both the weight and footprint of the flight controller, which is beneficial for maintaining the drone’s agility. In contrast, larger patterns support more complex controllers with additional features, suitable for more comprehensive aerial tasks.
-
-
Future Upgrades:
-
Consider your future upgrade path when selecting a mounting pattern. Staying with common patterns ensures that you have plenty of options for swapping or upgrading your flight controller without needing to change the drone frame.
-
Ultimately, understanding the mounting pattern of a flight controller is key to selecting the right hardware for your specific drone setup. Balancing frame compatibility with size and functionality will enhance your drone's performance and adaptability.
Question 36.
What types of sensors are typically integrated into a flight controller?
What Types of Sensors Are Typically Integrated Into a Flight Controller?
A flight controller, often referred to as an "FC," is the pivotal component that governs how an FPV (First-Person View) drone operates. This sophisticated circuit board relies on various sensors to interpret the drone's orientation, position, and user inputs, effectively keeping the drone stable and responsive.
Key Sensors in Flight Controllers
-
Gyroscope:
The gyroscope is crucial for detecting angular velocity. It senses any changes in the drone's rotational movements, allowing the FC to adjust motor speeds and maintain balance. -
Accelerometer:
This sensor measures linear acceleration, basically capturing how fast the drone speeds up or slows down. It helps ensure smooth and controlled flights by stabilizing the craft. -
Barometric Pressure Sensor (Barometer):
Although not mandatory in all FCs, barometers are used to measure altitude. By detecting air pressure changes, they provide crucial data for altitude hold and achieving stable heights during flights. -
Magnetometer (Compass):
A magnetometer aids in directionality, helping drones maintain a fixed heading. This is particularly useful during autonomous or GPS-aided flights where precise navigation is required.
Optional Enhancements
While the basic sensor suite is sufficient for most recreational flights, additional sensors can be integrated for more advanced applications. These may include GPS modules for enhanced positional accuracy and special sensors for collision avoidance.
With these sensors, a flight controller processes a vast amount of information to control the drone seamlessly, ensuring both stability and maneuverability.
Question 37.
Can a flight controller be used interchangeably on drones of varying sizes and weights?
Understanding Flight Controllers for Different Drone Sizes
When contemplating whether a flight controller can be used interchangeably on drones of diverse sizes and weights, several factors come into play. The flight controller is the brain of your drone, responsible for stabilizing and navigating the aircraft. Its compatibility is crucial to ensure efficient and safe flight operations.
Key Considerations
-
Weight and Power Needs:
-
Flight controllers don't directly handle power; instead, they manage signals to components like ESCs (Electronic Speed Controllers) and motors.
-
A heavier drone requires more powerful motors and ESCs, which can necessitate a flight controller capable of managing such demands without latency or compromise.
-
-
ESC and Motor Coordination:
-
For heavier drones, larger ESCs and motors are essential to provide sufficient thrust and control.
-
Ensure the flight controller can handle the increased current and voltage through its connections to ESCs. Compatibility with high-power ESCs is crucial for larger drones.
-
-
Firmware and Features:
-
Some flight controllers have firmware and features tailored for specific uses, such as racing, aerial photography, or complex autonomous tasks.
-
Ensure the firmware on the flight controller supports the specific requirements and features necessary for any size drone being considered.
-
-
Sensor Compatibility:
-
Larger drones might require additional sensors or GPS modules to maintain stability and control.
-
The flight controller must support additional ports and configurations for such sensors to function seamlessly across different drone sizes.
-
-
Physical Size and Mounting:
-
Consider the physical dimensions and mounting points on the drone frame. Larger drones may have more space, but the flight controller needs secure mounting to perform effectively.
-
Conclusion
In essence, while you can technically use the same flight controller across varying drone sizes, it must be compatible with the power demands, features, and physical installation of each particular drone. Often, using a flight controller designed for versatility with configurable settings and supporting various sensors and power requirements is ideal. Always check the specifications and ensure that your chosen flight controller can handle the intricacies of both lighter and heavier drones effectively.
Question 38.
How many UARTs are needed for hexacopters and octocopters, and what are the options for boards with more than 7 UARTs?
When building a hexacopter or an octocopter, it's essential to understand the difference between motor outputs and UARTs.
Motor Outputs vs. UARTs
-
Motor Outputs: Hexacopters require six motor outputs, while octocopters need eight. These outputs control the propellers.
-
UARTs (Universal Asynchronous Receiver-Transmitters): These are used for communication between the flight controller and other peripherals like telemetry modules, GPS, or receivers. They are not linked to the motor outputs.
How Many UARTs Do You Need?
For hexacopters and octocopters, the number of UARTs isn't directly tied to the number of motors. The UARTs you'll need depend on the additional peripherals you plan to use. However, more UARTs can provide flexibility for future upgrades or additional components.
Boards with More than 7 UARTs
If you need a flight controller with more than seven UARTs, there are several options available from third-party manufacturers. Look for advanced flight controllers that specify higher UART counts, which can be beneficial if you are integrating multiple complex systems like dual GPS units, telemetry, and FPV equipment.
Tips for Selecting a Board
-
Assess Your Needs: Determine how many peripherals require a UART connection.
-
Research High-UART Boards: Explore options from well-known suppliers specializing in multi-rotor electronics.
-
Consider Expandability: Choose a board that offers extra UARTs for potential future enhancements.
By understanding your specific requirements, you can select a suitable flight controller that accommodates all necessary communications without compromising your build's capabilities.
Question 39.
How can the bidirectional Dshot function affect motor spinning on certain flight controllers?
How Does Bidirectional Dshot Impact Motor Function on Flight Controllers?
The functionality of your flight controller, particularly when it comes to motor spinning, can be significantly influenced by the firmware version and specific settings like the bidirectional Dshot.
Bidirectional Dshot Setting:
Enabling the bidirectional Dshot function is crucial for certain flight controllers to operate the motors correctly. If this feature isn't activated, it might prevent the motors from spinning, even if they appear to be properly configured.
Firmware Compatibility:
Not all firmware versions support motor spinning without bidirectional Dshot enabled. For example, downgrading your flight controller firmware to version 4.4.3 might resolve issues seen in version 4.5.0, where the motors do not spin unless bidirectional Dshot is active.
Key Steps to Follow:
-
Verify Current Firmware: Ensure you know which version is currently installed.
-
Check Dshot Settings: Make sure the bidirectional Dshot option is activated in your controller settings.
-
Test with Different Firmware Versions: If problems persist, consider switching to a firmware version with confirmed compatibility, such as an earlier one like 4.4.3.
By adjusting these settings and versions, you can often restore motor functionality on your flight controller.
Question 40.
How has the mounting pattern for flight controllers changed?
Evolution of Mounting Patterns for Flight Controllers
The mounting patterns for flight controllers have seen significant evolution over the years, adapting to technological advancements and user preferences. Here's a breakdown of the changes:
-
Standardization Efforts: In the early days, there was little consistency, with various manufacturers using different mounting patterns, causing compatibility headaches for builders. Today, however, there's more uniformity, with two main patterns widely accepted.
-
Classic 30.5x30.5mm: Initially, the 30.5x30.5mm pattern was predominant. This size catered to larger frames and was universally adopted as the industry standard, providing a solid, stable platform that suited the bulky components of the time.
-
Emergence of 20x20mm: As technology advanced, allowing for more compact electronics, the 20x20mm pattern emerged. This smaller format is ideal for mini and micro quadcopters, offering significant weight savings and catering to the growing demand for agility and speed in smaller drone builds.
-
Crossover and Capability Expansion: Besides these two primary sizes, some manufacturers introduced alternate patterns like the 16x16mm for ultra-lightweight builds or tailored mounts to accommodate hybrid setups, fostering innovation in frame designs and usability.
-
Future Considerations: Looking ahead, the evolution continues toward even more compact and integrated solutions, driven by the need for flexibility and efficiency in both design and performance.
These changes reflect the dynamic nature of the drone industry, balancing tradition with innovation to meet the diverse needs of hobbyists and professionals alike.
Question 41.
What is soft mounting in flight controllers, and why is it important?
What is Soft Mounting in Flight Controllers, and Why is it Important?
Soft mounting is a technique used to enhance the performance of flight controllers by minimizing the impact of vibrations and noise from the drone's frame. This process is essential as it helps to ensure smooth and accurate flight operations, ultimately leading to more reliable control and better handling of the aircraft.
How Does Soft Mounting Work?
-
Vibration Dampening: By soft mounting, you can effectively reduce the transmission of vibrations from the drone's motors and propellers to the flight controller. This is typically achieved by using rubber grommets or dampening pads that act as a buffer zone, absorbing vibrations before they reach the sensitive components of the flight controller, such as the gyro.
-
Installation with Grommets: Most modern flight controllers are designed with M4 mounting holes that allow the insertion of rubber grommets. These grommets enable the use of M3 hardware to securely attach the flight controller to the frame, ensuring it remains stable yet cushioned.
-
Alternatives to Soft Mounting: While some flight controllers come with the gyro directly mounted on a piece of foam to reduce vibrations, this method is less common. It is generally sufficient to focus on adequately soft mounting the entire flight controller itself to achieve the desired effect.
Why is Soft Mounting Important?
-
Precision Control: By reducing vibrations, soft mounting enhances the precision and responsiveness of the flight controller, allowing for more accurate maneuvers and stability during flight.
-
Component Longevity: Excessive vibrations can lead to hardware fatigue and failure. Soft mounting helps prolong the lifespan of the flight controller by lessening the mechanical stress it endures.
-
Minimal Noise Interference: Reduced vibrations mean fewer noise signals reaching the gyro, leading to better sensor readings and overall flight performance.
Implementing soft mounting in your drone's flight controller setup is a straightforward step that can significantly improve flight quality and reliability, making it an indispensable practice for drone enthusiasts and professionals alike.
Question 42.
What is the significance of the wiring layout on a flight controller?
Understanding the Significance of Wiring Layout on a Flight Controller
The wiring layout on a flight controller is crucial because it dictates how easily you can connect various components, impacting both functionality and aesthetics. It's not just about having a high-performance controller with the best specifications; it's about how well these components integrate and communicate with each other.
Key Reasons Why Wiring Layout Matters:
-
Ease of Installation: A well-thought-out layout allows for a neat and straightforward installation. Components like the camera or VTX (Video Transmitter) should ideally be connected to pads that are functionally grouped and easily accessible. This minimizes the potential for errors and streamlines the assembly process.
-
Performance Optimization: Proper layout reduces signal interference among components. When camera signals are at the front and VTX signals are at the back, as commonly seen in efficient designs, it ensures clear signal transmission without unnecessary wiring clutter or cross-interference.
-
Aesthetic and Functional Appeal: By strategically placing solder pads around the edges of the flight controller, there’s less wiring overlay across the board. This not only looks cleaner but also prevents potential obstructions or damages to the board during operation.
-
Troubleshooting and Maintenance: With a logical layout, diagnosing issues and replacing components become less of a hassle. Clearly organized pads and groups mean you can quickly identify faults and make repairs without disassembling the entire setup.
In conclusion, a flight controller's wiring layout is a pivotal element that influences the ease of build, reliability, and overall user satisfaction in any drone or RC application. Choosing a board with an intuitive layout can enhance both your building experience and the performance of your machine.
Question 43.
How do you determine which gyro a flight controller uses?
How to Identify the Gyro in Your Flight Controller
Determining the gyro type in your flight controller is crucial for optimal performance. Here's how you can identify it:
-
Inspect the Chip: The first method involves physically examining the flight controller. Look for the IMU model number printed on its chip. Common models include the Invensense MPU-6000, among others.
-
Use Betaflight Configurator: If you prefer a software approach, connect your flight controller to a computer and open the Betaflight Configurator. Access the Command Line Interface (CLI) and enter the
status
command. Within the output, you will find the name of the IMU under the Gyro/Accelerometer section. -
Multiple Gyros Detected: Some flight controllers come equipped with more than one gyro. If this is the case, the CLI allows you to select which one to use. Simply enter the command
set gyro_to_use=0
orset gyro_to_use=1
, depending on which gyro you wish to activate.
These methods provide a straightforward way to determine which gyro your flight controller utilizes, ensuring you can configure it to meet your needs.
Question 44.
How to wire an external blackbox recorder like Openlager for flight controllers?
How to Wire an External Blackbox Recorder for Flight Controllers
Are you looking to enhance your flight control setup with an external blackbox recorder? A modern option like Openlager offers an efficient alternative for high-speed data logging compared to traditional solutions. Here’s a comprehensive guide to wiring and setting up an external blackbox recorder.
Why Choose a Modern Recorder?
When managing high loop times, traditional recorders like Openlog may fall short. Modern alternatives are designed to handle faster data rates, ensuring your flight data is captured accurately and efficiently.
Wiring Your External Blackbox
1. Gather Your Tools:
Before you begin, ensure you have these components:
-
Flight Controller (FC) that supports external logging
-
Blackbox recorder (e.g., Openlager)
-
Soldering tools
-
Connecting wires
2. Establish Connections:
To wire your recorder:
-
5V Supply: Connect the 5V pin from the recorder to a 5V power source on the FC.
-
Ground (GND): Connect the GND pin on the recorder to the ground on the FC to complete the circuit.
-
Data Connection: Link the RX pin on the recorder to a free TX port on your FC.
Make sure all connections are secure to prevent disconnection during operation.
Configuring Your Flight Controller
Once the hardware setup is complete, configure your FC software for data logging:
1. Port Configuration:
Access your flight controller's software (like Betaflight) and:
-
Navigate to the Ports tab.
-
Set the peripheral for the TX port you used for wiring to Blackbox logging.
-
Adjust the baud rate to 2,000,000.
2. Blackbox Setup:
In the Blackbox tab:
-
Set the Blackbox Device to Serial.
-
Choose your Debug Mode, such as gyro scaled, if you need specific data like noise analysis.
Initial Run and Configuration File
On the first run, the recorder will generate a configuration file on the SD card. Follow these steps to finalize the setup:
-
Open the configuration file and ensure the baud rate matches your port settings (2,000,000).
-
Save changes and safely eject the SD card.
Final Checks
Before you take to the skies:
-
Verify all connections and settings.
-
Perform a test recording to confirm data logging is working as expected.
By following these steps, you should have a reliable and efficient setup for capturing your flight data. Enjoy analyzing your flights with the precision and speed provided by your new blackbox recorder!
Question 45.
Can a different receiver be added to a flight controller with a built-in receiver, and where should it be soldered?
Yes, it's possible to add a different receiver to a flight controller that has an integrated receiver. Here's how you can do it:
Steps to Add a New Receiver:
-
Disable the Built-in Receiver:
-
First, ensure that the built-in receiver is completely disabled. Often, this can be done within your flight controller software by selecting the correct receiver protocol. This step prevents any interference with the new setup.
-
-
Choose Your New Receiver:
-
Select a compatible third-party receiver, such as FrSky, TBS Crossfire, or Spektrum. Make sure it aligns with your transmitter to avoid compatibility issues.
-
-
Identify Solder Pads:
-
Locate the UART pads on your flight controller. These pads are usually labeled as RX (receive) and TX (transmit). Check your controller’s manual to find the right ones; sometimes, you will use an RX pad alone since the receiver mainly sends data to the controller.
-
-
Solder the Receiver:
-
Carefully solder the signal, power, and ground wires from your new receiver to the corresponding pads:
-
Signal Wire (usually white or yellow): Connect this to the RX pad.
-
Power Wire (often red): Connect to a 5V or 3.3V pad based on your receiver’s requirements.
-
Ground Wire (black or brown): Connect to any ground (GND) pad on the controller.
-
-
-
Configure Your Flight Controller Software:
-
Once soldered, connect to your flight controller software. Set the receiver protocol and assign the UART that matches where you connected the new receiver.
-
-
Pair and Test:
-
Bind your new receiver to your transmitter. Test all controls to ensure the connection is stable and responsive.
-
By following these steps, you can successfully add an external receiver to a flight controller with a built-in option. Always refer to your specific flight controller and receiver manuals for detailed instructions.
Question 46.
What recommendations are there for using individual ESCs on drone arms instead of an integrated ESC?
Recommendations for Using Individual ESCs on Drone Arms
Choosing individual ESCs (Electronic Speed Controllers) for each arm of your drone offers the benefit of straightforward replacement if one component fails. This can be more convenient and economical than integrated ESCs, where a single failure might require replacing the entire unit. Here are some recommendations and considerations:
Why Choose Individual ESCs?
-
Flexibility: Allows you to replace or upgrade components separately without disassembling the entire power system.
-
Cooling: ESCs mounted on arms benefit from natural air cooling, potentially increasing efficiency.
-
Space Management: Ideal for configurations where space is at a premium and you need strategic placement of components.
Recommended Flight Controllers
While many flight controllers today are designed to work seamlessly with integrated ESCs, there are still good options available that support individual ESCs:
-
Modular Compatibility: Look for flight controllers that offer direct compatibility with a variety of ESCs, focusing on those that support separate connections. This feature provides excellent modularity.
-
Configurable Firmware: Opt for controllers that allow custom firmware configurations. This flexibility ensures you can tweak settings to get the best performance from your individual ESCs.
-
Ease of Wiring: Consider flight controllers with user-friendly wiring setups. This facilitates clean and efficient connections between the controller and ESCs on the arms.
Installation Tips
-
Wiring Layout: Plan your wiring carefully to avoid interference and maintain a clean aesthetic. Use cable management solutions like zip ties or clips.
-
Securing Components: Ensure that each ESC is securely mounted to minimize vibrations and possible damage during flight.
-
Testing and Calibration: After installation, perform thorough testing and calibration to ensure that each component is functioning optimally and that the drone responds as expected.
By thoughtfully selecting and setting up individual ESCs, you can achieve a robust design for your drone, maximizing both longevity and performance.
Question 47.
What updates have been made to flight controller information over the years?
Over the years, flight controller information has undergone numerous updates and improvements to keep pace with advanced technology and user needs. Here's a detailed look at the key changes:
2014
-
The journey began with the foundational creation of the article providing comprehensive flight controller information.
2016
-
Options for flight controller firmware were expanded, and features of the controllers themselves were thoroughly updated to reflect new capabilities.
2017
-
A significant update included advanced processor and gyro types, along with an insightful "FC Evolution" infographic. Additionally, the article was enhanced with updated information on various MPU types.
2018
-
Details about FC integration were expanded upon. Information such as mounting patterns was added to assist in installation and usability.
2020
-
A major overhaul: The URL was altered, and firmware along with gyro specifications received major updates. A new connection diagram/example was provided along with features explaining all-in-one controllers. Layout styles and camera control functionalities were also introduced.
2022
-
Latest insights on the BMI270 gyro were incorporated to keep the content up-to-date with current technology.
2023
-
A complete tutorial revision took place, and details on the ICM42688P gyro were added to ensure thorough and current guidance.
June 2024
-
The latest recommendations for flight controllers were revised to guide users towards the best choices available in the market.
These updates reflect an ongoing commitment to providing the most accurate and helpful information in the realm of flight controllers. The continuous evolutions ensure that both beginners and seasoned enthusiasts stay informed with the latest advancements.
Question 48.
How did the Multiwii project contribute to the development of flight controllers?
The Multiwii project played a pivotal role in advancing flight controller technology by pioneering a new kind of controller board. Initially inspired by the electronics used in gaming controllers, it effectively adapted these components to manage flight systems.
A major contribution was its use of an 8-bit Atmel processor, which provided a simpler yet efficient foundation for DIY and hobbyist drone enthusiasts. This made advanced flight control affordable and accessible. By leveraging open-source technology, the project fostered a community-driven approach, leading to frequent enhancements and innovations in flight controller designs.
The ripple effect of Multiwii's innovations inspired further developments, ultimately influencing the broader landscape of drone technology.
Question 49.
How do BECs (Battery Eliminator Circuits) function in flight controllers?
Understanding BECs in Flight Controllers
BECs, or Battery Eliminator Circuits, are vital components integrated within flight controllers, serving as voltage regulators for your various drone devices. They efficiently manage power distribution to components like the radio receiver, GPS, and video transmitter, ensuring these elements function optimally.
Core Functions of BECs
-
Voltage Regulation:
-
Flight controllers typically incorporate a 5V BEC to power essential equipment, such as radio receivers and GPS modules. This ensures that the energy they receive is both stable and sufficient, reducing the risk of component failure due to power inconsistencies.
-
-
Diverse Voltage Outputs:
-
Certain flight controllers come with additional 9V or 12V BECs specifically designed for powering the video transmitter. This versatility allows for a tailored power solution suitable for different FPV (First Person View) setups.
-
-
Power Filtering:
-
While direct connection to a LiPo battery is possible for many FPV components, it often introduces electrical noise and potential voltage spikes. BECs mitigate these issues by acting as effective power filters, providing a cleaner and more reliable power source that prolongs component life and enhances performance.
-
Best Practices for BEC Usage
-
Device Compatibility:
-
Assess the voltage and current requirements of your devices before connecting them to a BEC. Ensuring compatibility is crucial to prevent potential damage.
-
-
Wiring Setup:
-
For optimal results with an analogue FPV setup, accurate wiring is key. Utilize BEC outputs tailored to your devices for improved power management and performance stability.
-
Using a BEC not only safeguards your equipment but also contributes to a better flying experience by minimizing interference and potential power issues. Proper integration and utilization of BECs can significantly enhance the longevity and functionality of your drone's electronic components.
Question 50.
What is the definition of "built-in PDB" in flight controllers?
Understanding "Built-in PDB" in Flight Controllers
A "built-in PDB" in the context of flight controllers refers to an integrated Power Distribution Board. This feature allows the flight controller to manage the distribution of power directly to various components of the drone.
Key Functions of a Built-in PDB:
-
Powering ESCs: A built-in PDB typically allows Electronic Speed Controllers (ESCs) to draw power from the same board that houses the flight controller, simplifying wiring and reducing the need for additional connections or standalone PDBs.
-
Reducing Clutter: By integrating power distribution into the flight controller, the need for separate PDB units is eliminated, resulting in a cleaner, more streamlined wiring setup.
-
Convenience: This integration is particularly beneficial for those interested in a more compact and lightweight drone build, as it consolidates several functions into a single board.
In summary, a flight controller with a built-in PDB is designed to facilitate the power needs of the drone's ESCs and other components in a more efficient and space-saving manner. This feature is favored in modern drone setups for its simplicity and effectiveness in managing power distribution.
Question 51.
How do you connect a Raspberry Pi to a flight controller, and which settings are necessary?
Connecting a Raspberry Pi to a Flight Controller
When connecting a Raspberry Pi to a flight controller, it’s essential to get both the physical connections and the software settings right. Here’s a step-by-step guide to help you through the process.
Required Components
-
Raspberry Pi: Any model with GPIO pins
-
Flight Controller: Ensure compatibility and available UART ports
-
Jumper Wires: For attaching the Pi to the flight controller
-
Power Supply: Adequate power source for both the Raspberry Pi and controller
Physical Connections
-
Identify Ports: Locate the GPIO pins on your Raspberry Pi and the UART (TX and RX) ports on your flight controller.
-
Wire TX and RX: Connect the Raspberry Pi's TX pin to the flight controller's RX pin, and vice versa. This enables serial communication.
-
Ground Connection: Ensure both devices share a common ground by connecting their GND pins.
-
Power Supply: If applicable, connect a power wire from the flight controller to the Raspberry Pi. However, be cautious about voltage compatibility.
Software Settings
-
Enable UART on Raspberry Pi:
-
Access the Raspberry Pi configuration tool.
-
Navigate to the 'Interfaces' tab.
-
Enable the Serial Port and disable Serial Console.
-
-
Configure the Flight Controller Software:
-
Open your flight controller software (e.g., Betaflight or INAV).
-
Navigate to the 'Ports' tab.
-
Assign a UART port for communication with the Raspberry Pi.
-
-
Test the Connection:
-
Use terminal commands or a simple Python script on the Raspberry Pi to send or receive data.
-
Verify communication through the flight controller interface to ensure data is being successfully transmitted and received.
-
Final Considerations
-
Baud Rate: Make sure both devices are using the same baud rate for UART communication. Typical values are 9600, 57600, or 115200.
-
Data Verification: Confirm the data is being correctly interpreted and that commands (if applicable) are executed as expected.
By following these steps, you should establish a seamless connection between your Raspberry Pi and flight controller, allowing for efficient communication and control.
Question 52.
What are the various connector types used on flight controllers?
What Are the Various Connector Types Used on Flight Controllers?
When dealing with flight controllers, understanding the types of connectors available is essential for both assembly and repair. Each connector type offers its own advantages and caters to different skill levels and requirements.
-
Plastic JST Connectors
These connectors are easy to plug and unplug, making them a popular choice for hobbyists and beginners. They provide convenience but are relatively less durable than other options. This can be a drawback if you're looking for a long-lasting setup.
-
Solder Pads
Preferred by many for their robust nature, solder pads require you to solder wires directly to the controller. This involves more effort and skill but results in a more secure connection. This type is ideal if you want to ensure minimal wear and tear over time.
-
Through-Hole Connections
Through-hole connections offer versatility. They allow you to either solder directly or use header pins for more modular builds. This offers a balance between durability and convenience, catering to both seasoned builders and those seeking flexible options.
Understanding these connector types will help you choose the best option for your needs, whether you're aiming for simplicity, durability, or a mix of both.
Question 53.
What are the typical solder pads found on a flight controller and their purposes?
When working with a flight controller, understanding the various solder pads and their functions is essential for optimizing your drone setup. Here's a breakdown of the typical solder pads you'll encounter and their purposes:
Voltage Pads
-
VBAT, 3.3V, 5V, 9V: These pads supply power to external components. VBAT connects directly to the LiPo battery, providing the battery's full voltage. The 3.3V, 5V, 9V pads are powered by a Battery Eliminator Circuit (BEC), with 5V being the most common for powering peripherals. Some flight controllers also offer 9V or even 12V for powering devices like video transmitters. Be mindful of the amp limit each BEC pad can handle to avoid damage.
UART (Universal Asynchronous Receiver/Transmitter)
UART pads represent the serial communication ports critical for connecting external devices such as radio receivers, GPS, or video transmitters. Each UART includes:
-
TX pin: Transmits data to the peripheral device.
-
RX pin: Receives data from the peripheral device.
Connect TX on the device to RX on the flight controller, and vice versa. Flight controllers vary in the number of UARTs available; larger ones might have as many as six, whereas smaller versions may only have two.
For additional UART capability, tools like Betaflight offer a SoftSerial feature, converting specific pads into digital serial ports. However, these are slower and unsuitable for high-priority tasks like GPS.
Video and Camera Pads
-
Vin or Cam Pad: Used for FPV systems, this pad connects to the FPV camera. It enables the overlay of on-screen display (OSD) information on the video feed.
-
Vout or VTX Pad: Connects to your video transmitter (VTX), especially in analog setups.
i2C Pads
-
SDA and SCL: These are employed for connecting i2C protocol devices such as GPS compasses and barometers.
Buzzer Pads
-
BZ+ and BZ-: Utilize these pads to connect a beeper or buzzer, which can help locate the drone or signal different status alerts.
LED Pad
-
LED: This pad is designated for connecting RGB LED strips, allowing you to add lighting effects to your drone.
Selecting the right flight controller involves ensuring you have enough of these pads available for your planned components and setups. Always check the power ratings and potential extra features to ensure compatibility and optimal performance.
Question 54.
What protocols can be used with a high-end radio without additional attachments?
High-end radios often come equipped with versatile multi-protocol modules, enabling the use of multiple communication protocols without the need for additional attachments. These radios typically support a wide range of protocols such as:
-
FrSky: Known for its reliability and features, FrSky is popular among drone enthusiasts.
-
Futaba: Offers advanced features and is favored by professional modelers.
-
Spektrum: A common choice for beginners and hobbyists due to its user-friendly interface.
-
Flysky: Provides budget-friendly options with ample functionality.
-
DSM and DSMX: Widely used in RC cars and planes, ensuring compatibility across various models.
These versatile protocols allow users to switch between different models and applications easily, making high-end radios a flexible tool for hobbyists and professionals alike.
Question 55.
Who designed the first flight controller board for multirotors for hobbyists?
The origin of the first flight controller board for multirotors in the hobbyist world is a blend of innovation and community collaboration. In the early 2010s, the burgeoning interest in drones led to the creation of several flight controllers by enthusiasts and small companies.
The Early Innovators
-
Kiss FC and MultiWii: Among the pioneers were open-source projects like MultiWii, which used basic Arduino boards. MultiWii allowed hobbyists to customize and enhance their flight experience, making it accessible and adaptable. Similarly, the Kiss FC (Flyduino) made significant strides in simplifying setup and improving user experience.
-
OpenPilot and Naze32: OpenPilot also attracted significant attention by offering an easy-to-use interface and powerful stabilization features. Around the same time, the Naze32, which uses the STM32 processor, became very popular for its balance of cost, performance, and size.
The Role of Open Source and Community
The evolution of flight controllers was heavily influenced by the open-source community. Platforms like GitHub fostered collaboration, where developers from across the globe contributed to software and hardware improvements. This collective effort was crucial to pushing the boundaries of what flight controllers could achieve.
Conclusion
While it's challenging to pinpoint one individual or company responsible for the very first flight controller, the development was undoubtedly a communal effort. It was driven by innovators who were passionate about making drone technology accessible to hobbyists around the world.
Question 56.
What does the term "SCM" mean in the context of drone flight controllers?
Understanding SCM in Drone Flight Controllers
When discussing drone flight controllers, the term "SCM" stands for Signal Coupler Module. This hardware component plays a crucial role in facilitating the transfer of signals between various parts of the drone system, ensuring smooth communication and functionality.
Is SCM Common in FPV Drones?
In the realm of FPV (First Person View) drones, the Signal Coupler Module isn't a standard feature typically found in flight controllers. These drones primarily emphasize components essential for real-time video transmission and agile control, where an SCM might not be a necessary inclusion.
Choosing the Right Flight Controller
When selecting a flight controller for your FPV drone, you won't generally need to focus on whether it includes an SCM. Instead, prioritize features like responsiveness, compatibility with your drone's hardware, and support for the specific functions you require.
Remember, understanding the technical components and their relevance to your specific use case will aid in making informed decisions while customizing or upgrading your drone.
Question 57.
How has Betaflight evolved since its initial release?
The Evolution of Betaflight Since Its Inception
Betaflight began its journey in 2015, spearheaded by a developer known as "BorisB", who built upon the foundation of another firmware, Cleanflight. Initially, the goal was to enhance Cleanflight's performance while introducing innovative features and capabilities.
Over the years, Betaflight has undergone significant transformation, setting itself apart from its predecessor. What started as an improvement project eventually evolved into a standalone entity in the realm of flight controller firmware.
Key Milestones in Betaflight's Development:
-
Divergence from Cleanflight: While it began by modifying Cleanflight's code, Betaflight gradually carved its own path, adding unique features that catered specifically to the needs of FPV drone enthusiasts.
-
Feature Expansion: Continuous updates have seen Betaflight incorporate advanced functionalities that improve flight stability, enhance control precision, and support a wide array of hardware components.
-
Popularity Surge: Its dedicated improvements and adaptability have made it the most widely-used firmware in the FPV drone community.
-
Ongoing Development: The firmware remains under active development, with frequent updates reflecting user feedback and technological advancements.
Today, Betaflight is not only a separate entity but also a benchmark in FPV drone firmware, renowned for its performance, customization, and community-driven evolution.
Question 58.
What are the key differences between Betaflight and Cleanflight?
Key Differences Between Betaflight and Cleanflight
Betaflight and Cleanflight are both popular firmware options used in drone flight controllers, but they have evolved to serve different priorities and audiences.
-
Origins and Development:
-
Cleanflight: Launched initially as a general-purpose firmware, Cleanflight aims to provide a stable and straightforward experience for hobbyists.
-
Betaflight: Originating from modifications made to Cleanflight's source code, Betaflight emerged in 2015 by a developer named "BorisB". It has since focused on enhancing performance and adding advanced features.
-
-
Performance Optimization:
-
Betaflight: Known for prioritizing high performance and responsiveness, Betaflight is tailored for racing drones where every millisecond counts. It offers fine-tuning capabilities that cater to competitive flying.
-
Cleanflight: While still a solid choice, Cleanflight prioritizes stability over the cutting-edge performance enhancements Betaflight provides.
-
-
Feature Set:
-
Betaflight: Continuously updates to include the latest innovations and improvements in drone technology. Users can expect more frequent updates with new capabilities that push the envelope for drone enthusiasts.
-
Cleanflight: Tends to have a more standard set of features, focusing on reliability and ease of use, making it suitable for those seeking straightforward functionality without constant upgrades.
-
-
Community and Support:
-
Betaflight: Boasts an active community of developers and users who contribute to its rapid innovation cycle, facilitating a robust support system for troubleshooting and enhancements.
-
Cleanflight: Although still supported, it doesn’t have the same level of community-driven development, leading to fewer updates and innovations compared to Betaflight.
-